Technics PE II-A
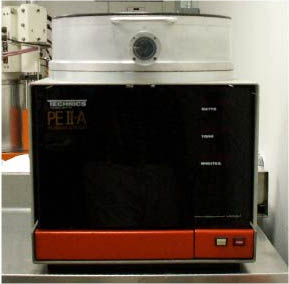
S/N: 30706
The Technics PEII-A is a plasma etching system used for descumming/ashing of photoresist and nitride etching. The chamber accommodates multiple 4 wafers or a single 6 wafer. This system may be used either in manual or auto mode.
Available Gases:
- O2 (Gas 1)
- H2O (Gas 2)
- Parylene: 0.18 um/min @ 300 W
- Photoresist 1813: See previous page
- Photoresist 9260:
Precautions and Hints
- Always leave the vent on when you begin a pump down -- switch vent off after 2-3 seconds. This will sweep the oil that has collected at the hose end near the chamber back toward the mechanical pump. (Note: The SOL'N should always be OFF when you vent the chamber, but VENT should always be on when you begin to pump down the chamber.)
- Always leave the vent on when the chamber is open.
Starting Up
- The vacuum pump should be off.
- Check the status of the controls on the front of the machine. It should be in the following condition:
| Parameter | Setting |
| Main Power | ON |
| Mode | Manual |
| Solenoid | Closed |
| Vent | Closed |
| RF Power Switch | OFF |
| RF Power | Fully counterclockwise (0) |
| Gas 1 | OFF |
| Gas 2 | OFF |
Vent Chamber:
When you are ready to introduce your sample:
- Toggle the VENT valve switch on. (Be sure that the solenoid (SOLN) on the vacuum line is closed when you do this.)
- Wait 1 minute for the chamber to fill.
- Once it is at atmospheric pressure, open it carefully (the top is very heavy) and place your wafers on the plate. Close the top carefully, being sure not to allow it to fall.
Running the System
Manual Mode
- Close the lid.
- You are now ready to start the vacuum pump. Close the VENT and toggle the SOLN (vacuum pump) switch open.
- When the system reaches less than .1 Torr, you can introduce the gas you wish to use into the chamber by toggling the appropriate gas switch (O2 or H2O). Use the knob to set the desired gas pressure in the system (Typical pressure = 0.3 Torr).
- Turn on the RF power and turn the dial clockwise until the desired power is reached (Typical Power 200W). You can see the plasma through the window on the front of the chamber.
- Begin timing your run.
- When the run is complete, turn off the RF power first. ALWAYS turn off the RF power before turning off the gas(es).
- Close off the GAS switch and allow the chamber to pump down to 30 mtorr so you can be sure all gases have been swept out of the chamber.
- Turn off the vacuum pump by switching the SOLN toggle to the closed position. Now you may vent the chamber by switching the VENT toggle on.
- The chamber pressure will now come up to atmosphere and you may remove your sample.
Auto Mode
- To run the system in auto mode, it is a good idea to preset the power and gas flow settings by running the desired gas into the chamber and striking a plasma following the above procedure. Set the pressure and then the power and then return the system to standby.
- Once the power and pressure are set and your wafers have been loaded into the chamber, switch Mode to AUTO. Auto mode overrides any manual control over the system, so you may proceed to:
- Open the solenoid (SOLN).
- Close the VENT.
- Turn on the RF Power switch. Do not touch the knob as you have preset the power.
- Turn on the required gas.
- Set the time.
- Note that in turning on all these switches nothing happens... yet. Now you are ready to begin your run.
- Push the white START/STOP button on the front of the system. The chamber will pump down, start gas flow, strike a plasma and time your run. When time is up, the system alarm will sound. Push the START/STOP button to silence the alarm. The system should now be pumped down. This is done by returning the system to manual as follows:
- First, close off the power, and the gas toggles. Leave the SOLN open, so that when you return the mode to manual, the pump will start and the system will pump down. When the system reaches base pressure, shut off the vacuum pump and vent the chamber to remove your sample.
- Remember always to close the solenoid once the system is down to base pressure to prevent back streaming of pump oil. Then disable the system.
Restoring the System to Standby
Once your sample has been removed:
- Close the chamber and start the vacuum with the vent open.
- Wait 5-10 seconds.
- Close the vent and allow the chamber to pump down to 35 mtorr.
- Close the SOLN. Be sure that gas switches and RF power are off. Leave the main POWER on.
[http://microlab.berkeley.edu/labmanual/chap7/7.11.html|UC Berkeley Microlab Manual link]
Process Recipes
Note: We do not have flow control for any gases, only pressure.
Usu pdms bonding Dec 2014SUCCESSFUL- 100 W
- 30 sec
- 300 mTorr O2 pressure
- Base pressure: 150 mT
NOT WORKING
- 75 W
- 30 sec
- 300 mTorr O2 pressure
- Base pressure: 150 mT
Descum
This is used after developing exposed photoresist, before hard baking, to eliminate any residual scum, which may be present. Settings:
- Gas: O2 (Gas 1)
- Flow: 51.1 sccm
- Power: 50 Watts
- Pressure: 270-280 mTorr
- Time: 1 min.
Resist Stripping or Ashing
For complete removal of standard hard baked G and I-line photoresist. Settings:
- Gas: O2 (Gas 1)
- Flow: 51.1 sccm
- Power: 300 Watts
- Pressure: 270 - 280 mTorr
- Time: 7 min.
Use this procedure to clean the chamber before doing any SF6 nitride etching. Settings:
- Gas: O2 (Gas 1)
- Flow: 51.1 sccm
- Power: 300 Watts
- Pressure: 300 mTorr
- Time: 20- 30 min.
Water Vapor Operation & Testing Procedure
Testing Parameters
Power: 600 W
Pressure: 500 mT
Run time: 5 min.
Manual Operation
- Turn off the SOLN switch on the front of the Technics and turn on the VENT switch. This will of course close the vacuum line and vent the chamber with N2. The lid will pop up when pressure has equalizd. Turn of VENT.
- Load teh sample so it is centered on the wire screen.
- Close the lid carefully and turn on the SOLN swtich. Let the chamber pump down to 100 mT.
- Turn on the water vapor and oxygen switches and adjust the oxygen flow so that the chamber pressure balances around 500 mT (there isno water vapor flow adjustment).
- Turn of the PLASMA and double check that the power is at the desired level. Start a timer as well.
- After time is up,turn off PLASMA, O2, H2O, and SOLN swtiches, in that order. Turn on VENT and wait for the pressure to eqaulize and the lid to pop. Carefully remove the sample, as it my be hot.
- Etch rate
- Etch uniformity
- Final cleanliness (Is residue left behind?)
The MKS Vapor on Demand Module (VoDM) supplies water vapor to the chamber via a masss flow controller, which can be opened or closed using the switch on the front of the Technics machine (gas #2).
The VoDM is further controlled and read by the bronze power supply and smal PCB circuit on top of it. the vapor flow rate is controlled by 0-5 VDC signal (0-100% flow), which can be adjusted by the POT on top of the PCB. Note: the minimum voltage that the VoDM can read is around .3v. Below that it will shut off.
To verify the flow rate, a voltage reading can be taken between pins 2 and 11, which should match the flow rate input voltage.
Additional readings can be taken on the following pins:
- Manual Valve Control
- Flow Output
- Inlet Valve
- Outlet Valve
- Flow Set Point
- Exhaust Pressure Output
- Error Output Ground System At Temperature Auto balance
When the VoDM is up to temperature and has stabilized, four green LEDs will be constantly on inside the VoDM, which can be viewed through the case. If any LEDs are blinking, refore to the VoDM manual for error codes. Note that it may take up to 3 hour for the unit to heat up and stabilize.
Under normal operating conditions, no adjustments will need to be made to the VoDM controller, and the VoDM should be controlled by the on/off switch on the front of the Technics (gas #2).